mirror of
https://github.com/ant-design/ant-design.git
synced 2025-01-09 04:58:38 +08:00
378 lines
14 KiB
Markdown
378 lines
14 KiB
Markdown
---
|
||
group:
|
||
title: 如何使用
|
||
order: 4
|
||
title: 在 Umi 中使用
|
||
---
|
||
|
||
在真实项目开发中,除了 Ant Design 这样的 UI 库,你可能会还会需要构建工具、路由方案、CSS 方案、数据流方案、请求库和请求方案、国际化方案、权限方案、Icons 方案等等,才能完成一个完整的项目。我们基于业务场景,推出了基于 React 的企业级应用框架 [Umi](https://umijs.org/),推荐你在项目中使用。
|
||
|
||
Umi,中文发音为「乌米」,是可扩展的企业级前端应用框架,也是蚂蚁集团的底层前端框架,已直接或间接地服务了 10000+ 应用。Umi 以路由为基础,同时支持配置式路由和约定式路由,保证路由的功能完备,并以此进行功能扩展。然后配以生命周期完善的插件体系,覆盖从源码到构建产物的每个生命周期,支持各种功能扩展和业务需求。
|
||
|
||
本文会引导你使用 Umi、Ant Design 和 [Ant Design Pro](https://pro.ant.design/) 从 0 开始创建一个简单应用。
|
||
|
||
## 初始化项目
|
||
|
||
推荐使用 [pnpm](https://pnpm.io/zh/) 创建 Umi 脚手架,执行以下命令。
|
||
|
||
```bash
|
||
$ mkdir myapp && cd myapp
|
||
$ pnpm create umi
|
||
```
|
||
|
||
> 如果你使用 npm,可执行 `npm create umi`,效果一致;如果你使用 yarn,可执行 `yarn create umi`,效果也一致;如果你使用 bun,那说明你是个非常潮的人,可执行 `bunx create-umi`(注意,`create` 和 `umi` 之间有个 `-`)。
|
||
|
||
这里选「Simple App」,因为我们要从 “0” 开始。
|
||
|
||
```bash
|
||
? Pick Umi App Template › - Use arrow-keys. Return to submit.
|
||
❯ Simple App
|
||
Ant Design Pro
|
||
Vue Simple App
|
||
```
|
||
|
||
这里建议选「pnpm」,pnpm 在速度以及处理幽灵依赖方面都更有优势。
|
||
|
||
```bash
|
||
? Pick Npm Client › - Use arrow-keys. Return to submit.
|
||
npm
|
||
cnpm
|
||
tnpm
|
||
yarn
|
||
❯ pnpm
|
||
```
|
||
|
||
这里国内的朋友建议选「taobao」,否则选「npm」。选择 npm taobao 源在安装依赖时通常会更快一些。
|
||
|
||
```bash
|
||
? Pick Npm Registry › - Use arrow-keys. Return to submit.
|
||
npm
|
||
❯ taobao
|
||
```
|
||
|
||
然后工具会自动安装依赖,并执行 Umi 的初始化脚本。
|
||
|
||
在启动项目之前,我们再安装一些本教程会用到的依赖。
|
||
|
||
```bash
|
||
$ pnpm i @umijs/plugins -D
|
||
$ pnpm i antd axios @ant-design/pro-components -S
|
||
```
|
||
|
||
其中 `@umijs/plugins` 是 Umi 的官方插件集,包含了 valtio、react-query、styled-components、locale、access、qiankun 等大量插件,可让用户通过配置的方式一键开启和使用;`antd` 就不用介绍了;`axios` 是请求库;`@ant-design/pro-components` 是用于生成中后台布局的组件。(这里将运行时依赖和编译时依赖分别保存到 dependencies 和 devDependencies,是目前社区推荐的方式)
|
||
|
||
完成后,执行以下命令启动项目。
|
||
|
||
```bash
|
||
$ npm run dev
|
||
umi dev
|
||
info - Umi v4.0.46
|
||
╔════════════════════════════════════════════════════╗
|
||
║ App listening at: ║
|
||
║ > Local: http://localhost:8000 ║
|
||
ready - ║ > Network: http://*********:8000 ║
|
||
║ ║
|
||
║ Now you can open browser with the above addresses↑ ║
|
||
╚════════════════════════════════════════════════════╝
|
||
```
|
||
|
||
跟着提示点击命令行里的 url,会自动打开浏览器。如果顺利,你会看到如下界面。
|
||
|
||

|
||
|
||
## 新建路由
|
||
|
||
我们要写个应用来先显示产品列表。首先第一步是创建路由,路由可以想象成是组成应用的不同页面。Umi 用户通常不需要关心 Umi 背后的实现,但如果你想知道,Umi 的路由是基于 react-router@6.3 实现(注:不是最新的 6.4,6.4 包含的 loader 和 action 功能并不是 Umi 所需要的)。
|
||
|
||
我们通过命令即可创建路由。
|
||
|
||
```bash
|
||
$ npx umi g page products
|
||
Write: src/pages/products.tsx
|
||
Write: src/pages/products.less
|
||
```
|
||
|
||
然后修改配置文件 `.umirc.ts` 加上新增的路由声明。
|
||
|
||
```diff
|
||
import { defineConfig } from "umi";
|
||
|
||
export default defineConfig({
|
||
routes: [
|
||
{ path: "/", component: "index" },
|
||
{ path: "/docs", component: "docs" },
|
||
+ { path: "/products", component: "products" },
|
||
],
|
||
npmClient: "pnpm",
|
||
});
|
||
```
|
||
|
||
由于脚手架默认使用的是配置式路由,顾名思义,就是路由是自己一行行配出来的,虽然繁琐,但灵活性更高,这种方式需要在配置里加上 routes 字段,详见 [Umi 文档之路由](https://umijs.org/docs/guides/routes)。此外,Umi 还支持约定式路由,意思是文件系统即路由,所以无需配置路由即可生效。
|
||
|
||
然后我们编辑下 `src/layouts/index.tsx` 文件,在全局布局路由里加上到 `/products` 路径的导航。
|
||
|
||
```diff
|
||
<li>
|
||
<Link to="/docs">Docs</Link>
|
||
</li>
|
||
+ <li>
|
||
+ <Link to="/products">Products</Link>
|
||
+ </li>
|
||
```
|
||
|
||
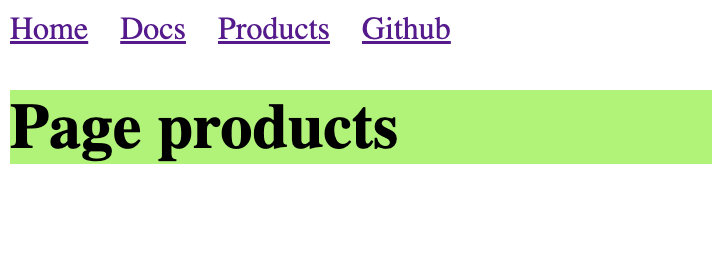
打开 http://localhost:8000/products ,如果顺利,你会看到如下页面。
|
||
|
||

|
||
|
||
## 实现 Product UI 组件
|
||
|
||
随着应用的发展,你会需要在多个页面分享 UI 元素(或在一个页面使用多次),在 Umi 里你可以把这部分抽成 component 。我们来编写一个 ProductList 组件,这样就能在不同的地方显示产品列表了。
|
||
|
||
新建 `src/components/ProductList.tsx` 文件,内容如下。
|
||
|
||
```tsx
|
||
import React from 'react';
|
||
import { Button, Popconfirm, Table } from 'antd';
|
||
import type { TableProps } from 'antd';
|
||
|
||
interface DataType {
|
||
id: string;
|
||
name: string;
|
||
}
|
||
|
||
const ProductList: React.FC<{ products: DataType[]; onDelete: (id: string) => void }> = ({
|
||
onDelete,
|
||
products,
|
||
}) => {
|
||
const columns: TableProps<DataType>['columns'] = [
|
||
{
|
||
title: 'Name',
|
||
dataIndex: 'name',
|
||
},
|
||
{
|
||
title: 'Actions',
|
||
render(text, record) {
|
||
return (
|
||
<Popconfirm title="Delete?" onConfirm={() => onDelete(record.id)}>
|
||
<Button>Delete</Button>
|
||
</Popconfirm>
|
||
);
|
||
},
|
||
},
|
||
];
|
||
return <Table rowKey="id" dataSource={products} columns={columns} />;
|
||
};
|
||
|
||
export default ProductList;
|
||
```
|
||
|
||
## 准备 Mock 数据
|
||
|
||
假设我们已经和后端约定好了 API 接口,那现在就可以使用 Mock 数据来在本地模拟出 API 应该返回的数据,这样一来前后端开发就可以同时进行,不会因为后端 API 还在开发而导致前端的工作被阻塞。Umi 提供了开箱即用的 [Mock 功能](https://umijs.org/docs/guides/mock),能够用方便简单的方式来完成 Mock 数据的设置。
|
||
|
||
在根目录下新建 `mock/products.ts` 文件,内容如下。
|
||
|
||
```ts
|
||
import { defineMock } from 'umi';
|
||
|
||
type Product = {
|
||
id: string;
|
||
name: string;
|
||
};
|
||
|
||
let products: Product[] = [
|
||
{ id: '1', name: 'Umi' },
|
||
{ id: '2', name: 'Ant Design' },
|
||
{ id: '3', name: 'Ant Design Pro' },
|
||
{ id: '4', name: 'Dva' },
|
||
];
|
||
|
||
export default defineMock({
|
||
'GET /api/products': (_, res) => {
|
||
res.send({
|
||
status: 'ok',
|
||
data: products,
|
||
});
|
||
},
|
||
'DELETE /api/products/:id': (req, res) => {
|
||
products = products.filter((item) => item.id !== req.params.id);
|
||
res.send({ status: 'ok' });
|
||
},
|
||
});
|
||
```
|
||
|
||
然后访问 http://localhost:8000/api/products ,就能看到接口响应结果了。
|
||
|
||
## 完成 products 页
|
||
|
||
完成了 UI 组件和 Mock 数据,是时候把他们结合到一起了。这里需要用到请求方案,我们在这里的选择是 react-query(如果你想说 @tanstack/react-query,没错,他们是同一个库,@tanstack/react-query 是 react-query 改名后的包)。所以在开始之前,需要修改配置启用一键启用 [Umi 的 react-query 插件](https://umijs.org/docs/max/react-query)。
|
||
|
||
先编辑 `.umirc.ts`,由于有探测到不能热更的配置项变更,配置文件保存后 umi dev 的 server 会自动重启。
|
||
|
||
```diff
|
||
import { defineConfig } from "umi";
|
||
|
||
export default defineConfig({
|
||
+ plugins: ['@umijs/plugins/dist/react-query'],
|
||
+ reactQuery: {},
|
||
routes: [
|
||
{ path: "/", component: "index" },
|
||
{ path: "/docs", component: "docs" },
|
||
{ path: "/products", component: "products" },
|
||
],
|
||
npmClient: 'pnpm',
|
||
});
|
||
```
|
||
|
||
再编辑 `src/pages/products.tsx`,内容如下。
|
||
|
||
```tsx
|
||
import React from 'react';
|
||
import axios from 'axios';
|
||
import { useMutation, useQuery, useQueryClient } from 'umi';
|
||
|
||
import styles from './products.less';
|
||
import ProductList from '@/components/ProductList';
|
||
|
||
export default function Page() {
|
||
const queryClient = useQueryClient();
|
||
const productsQuery = useQuery(['products'], {
|
||
queryFn() {
|
||
return axios.get('/api/products').then((res) => res.data);
|
||
},
|
||
});
|
||
const productsDeleteMutation = useMutation({
|
||
mutationFn(id: string) {
|
||
return axios.delete(`/api/products/${id}`);
|
||
},
|
||
onSettled: () => {
|
||
queryClient.invalidateQueries({ queryKey: ['products'] });
|
||
},
|
||
});
|
||
if (productsQuery.isLoading) return null;
|
||
return (
|
||
<div>
|
||
<h1 className={styles.title}>Page products</h1>
|
||
<ProductList
|
||
products={productsQuery.data.data}
|
||
onDelete={(id) => {
|
||
productsDeleteMutation.mutate(id);
|
||
}}
|
||
/>
|
||
</div>
|
||
);
|
||
}
|
||
```
|
||
|
||
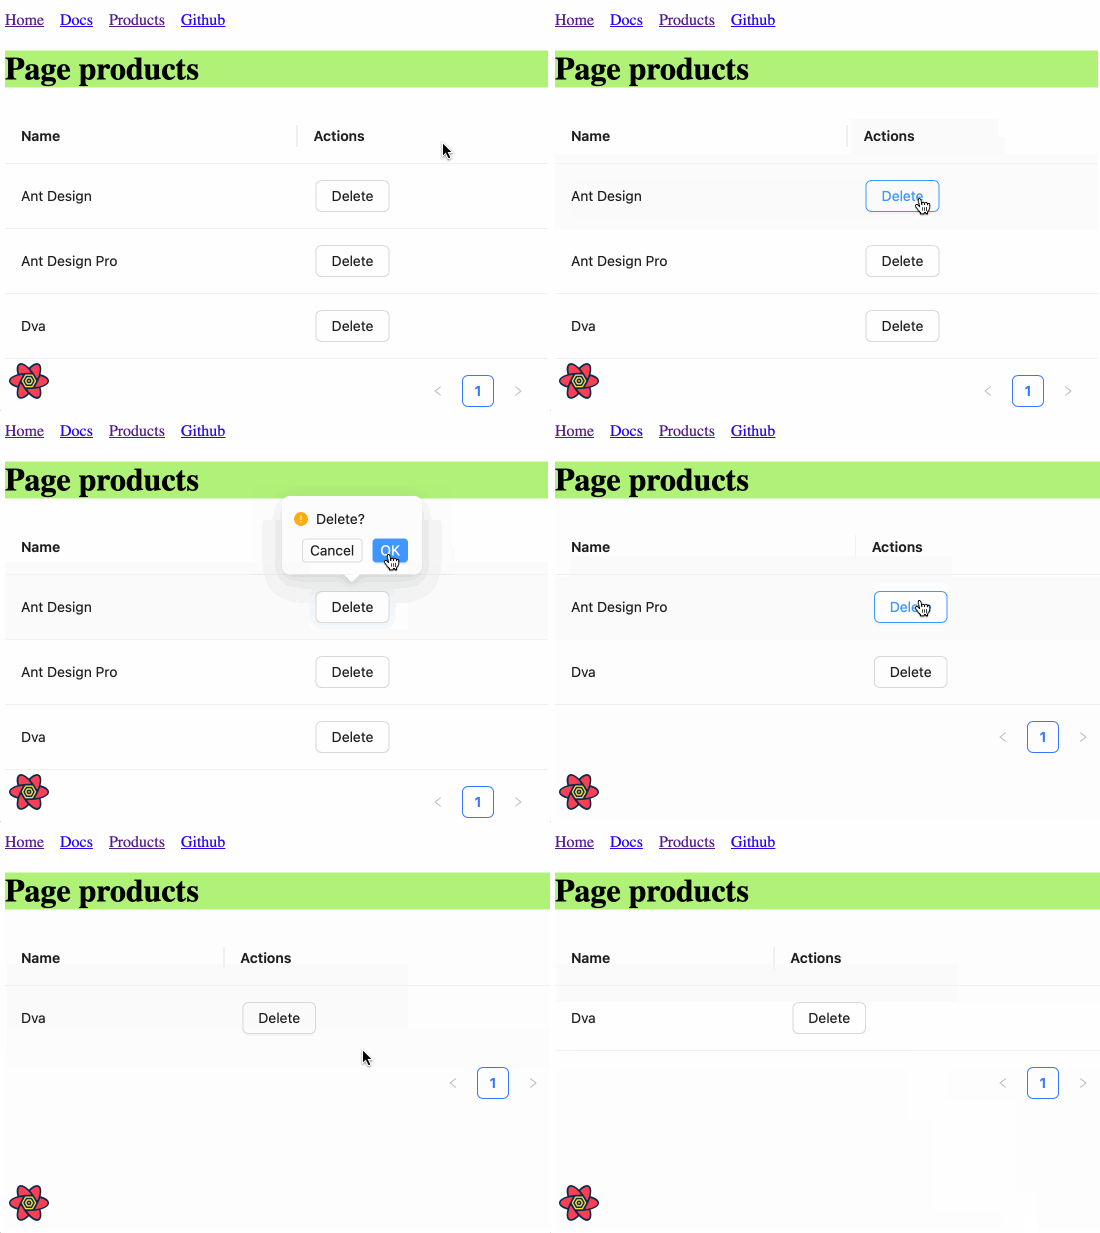
这里,我们通过 `useQuery()` 拉取来自 `/api/products` 的数据,然后在 `onDelete` 事件里通过 `useMutation()` 提交 DELETE 请求到 `/api/products/${id}` 进行删除操作。关于 react-query 的详细使用,可参考 [Umi 插件之 React Query](https://umijs.org/docs/max/react-query) 和 [React Query 官网](https://tanstack.com/query/)。
|
||
|
||
保存后,你应该会看到如下界面。
|
||
|
||

|
||
|
||
## ProLayout
|
||
|
||
一个标准的中后台页面,一般都需要一个布局,这个布局很多时候都是高度雷同的,[ProLayout](https://procomponents.ant.design/components/layout/) 封装了常用的菜单、面包屑、页头等功能,提供了一个不依赖的框架且开箱即用的高级布局组件。并且支持 `side`, `mix`, `top` 三种模式,更是内置了菜单选中、菜单生成面包屑、自动设置页面标题的逻辑。
|
||
|
||
先修改配置,为每个路由新增 name 字段,用于给 ProLayout 做菜单渲染使用。
|
||
|
||
```diff
|
||
import { defineConfig } from "umi";
|
||
|
||
export default defineConfig({
|
||
routes: [
|
||
- { path: "/", component: "index" },
|
||
+ { path: "/", component: "index", name: "home" },
|
||
- { path: "/docs", component: "docs" },
|
||
+ { path: "/docs", component: "docs", name: "docs" },
|
||
- { path: "/products", component: "products" },
|
||
+ { path: "/products", component: "products", name: "products" },
|
||
],
|
||
plugins: ["@umijs/plugins/dist/react-query"],
|
||
reactQuery: {},
|
||
npmClient: "pnpm",
|
||
});
|
||
```
|
||
|
||
编辑 `src/layouts/index.tsx`,内容如下。
|
||
|
||
```tsx
|
||
import { ProLayout } from '@ant-design/pro-components';
|
||
import { Link, Outlet, useAppData, useLocation } from 'umi';
|
||
|
||
export default function Layout() {
|
||
const { clientRoutes } = useAppData();
|
||
const location = useLocation();
|
||
return (
|
||
<ProLayout
|
||
route={clientRoutes[0]}
|
||
location={location}
|
||
title="Umi x Ant Design"
|
||
menuItemRender={(menuItemProps, defaultDom) => {
|
||
if (menuItemProps.isUrl || menuItemProps.children) {
|
||
return defaultDom;
|
||
}
|
||
if (menuItemProps.path && location.pathname !== menuItemProps.path) {
|
||
return (
|
||
<Link to={menuItemProps.path} target={menuItemProps.target}>
|
||
{defaultDom}
|
||
</Link>
|
||
);
|
||
}
|
||
return defaultDom;
|
||
}}
|
||
>
|
||
<Outlet />
|
||
</ProLayout>
|
||
);
|
||
}
|
||
```
|
||
|
||
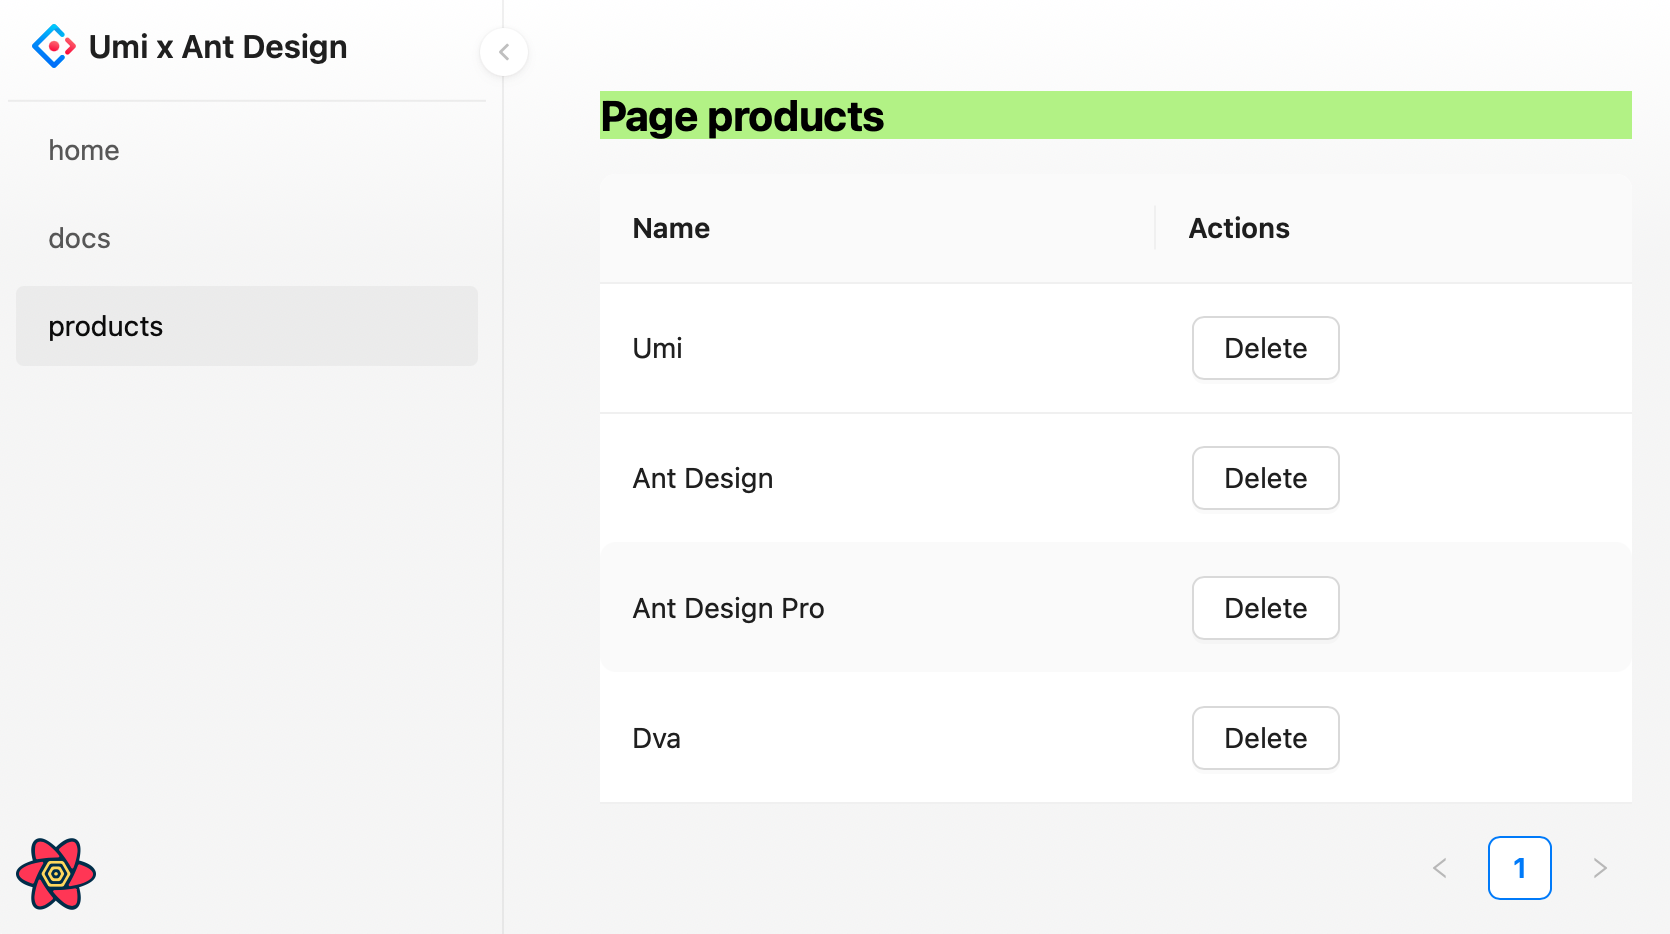
这里先用 Umi 的 `useAppData` 拿到全局客户端路由 `clientRoutes`,这是一份嵌套结构的路由表,我们把 `clientRoutes[0]` 传给 ProLayout;再通过 `useLocation()` 拿到 location 信息,也传给 ProLayout 来决定哪个菜单应该高亮;同时我们希望点击菜单时做路由跳转,需要定制 ProLayout 的 `menuItemRender` 方法。
|
||
|
||
聪明的你可能已经发现 `src/layouts/index.less` 已经不再被引用了。为了保持项目文件的整洁,可以选择将其删除。
|
||
|
||
此时浏览器会自动刷新,如果顺利,你会看到如下界面。
|
||
|
||

|
||
|
||
## 构建应用
|
||
|
||
完成开发并且在开发环境验证之后,就需要部署给我们的用户了,执行以下命令。
|
||
|
||
```bash
|
||
$ npm run build
|
||
info - Umi v4.0.46
|
||
✔ Webpack
|
||
Compiled successfully in 5.31s
|
||
info - File sizes after gzip:
|
||
122.45 kB dist/umi.js
|
||
575 B dist/src__pages__products.async.js
|
||
312 B dist/src__pages__index.async.js
|
||
291 B dist/layouts__index.async.js
|
||
100 B dist/layouts__index.chunk.css
|
||
55 B dist/src__pages__products.chunk.css
|
||
event - Build index.html
|
||
```
|
||
|
||
构建会打包所有的资源,包含 JavaScript, CSS, Web Fonts, 图片, HTML 等。你可以在 `dist/` 目录下找到这些文件。
|
||
|
||
## 下一步
|
||
|
||
我们已经完成了一个简单应用,你可能还有很多疑问,比如:
|
||
|
||
- 如何统一处理出错?
|
||
- 如何处理更多路由,比如动态路由、嵌套路由、权限路由等?
|
||
- 如何使用数据流方案?
|
||
- 如何修改 webpack 配置或切换到 vite 构建模式?
|
||
- 等等
|
||
|
||
你可以:
|
||
|
||
- 访问 [Umi 官网](https://umijs.org/)
|
||
- 了解 [Umi 的路由](https://umijs.org/docs/guides/routes)
|
||
- 了解比 Umi 集成度更高的 [Umi Max](https://umijs.org/docs/max/introduce)
|
||
- 了解开箱即用的中后台脚手架 [Ant Design Pro](https://pro.ant.design/)
|
||
- 了解高级布局 [ProLayout](https://procomponents.ant.design/components/layout)
|
||
- 了解高级表格 [ProTable](https://procomponents.ant.design/components/table)
|